
|
|
|
|
#1 |
|
Участник
|
powerobjects: Row-Level Security in Power BI with Dynamics 365
Источник: https://www.powerobjects.com/2018/07...-dynamics-365/
==============  Power BI offers a suite of security features to help restrict data. One way to do this is with Row-level security. Row-level security (RLS) with the Power BI Desktop can be used to restrict data access for specific users, filtering data at the row level, and defining filters within roles. In today’s blog, we’ll go over how to set-up this feature in Power BI and an example of how you can use it in Dynamics 365. What you will need:
Our starting point will be the image below, all orders put into a simple Orders Dashboard.  Defining Roles within Power BI Desktop 1. Select the Modeling tab. 2. Select Manage Roles.  3. Select Create. 4. Provide a name for the role. 5. Select the table to apply a DAX expression. 6. Enter the DAX expressions. This expression should return a true or false.  7. Select Save. Viewing a Role within Power BI Desktop Once your role has been created, you can view the results of the role by executing the following steps: 1. From the Modeling tab, select View as Roles.  2. The View as Roles dialog allows you to change the view of what you are seeing for that specific user or role.  3. Select the role you created and then select OK to apply that role to what you are viewing. The reports will only render the data relevant for that role. 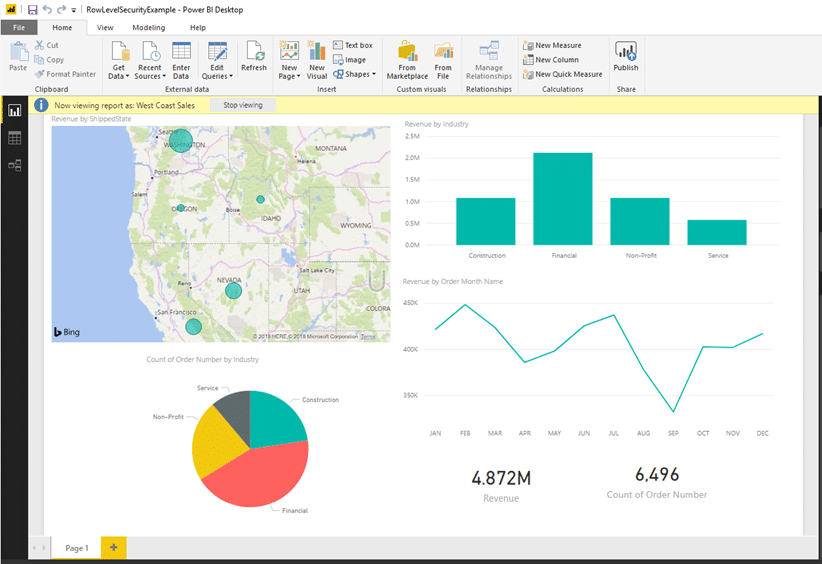 Compared to the image we saw earlier; the difference is clear:  We are now ready to assign the role to a new user. Assigning Roles in Power BI 1. Navigate to the Power BI service. 2. Go to DATASETS and click on the ellipses to the right of the name. 3. Click on SECURITY. 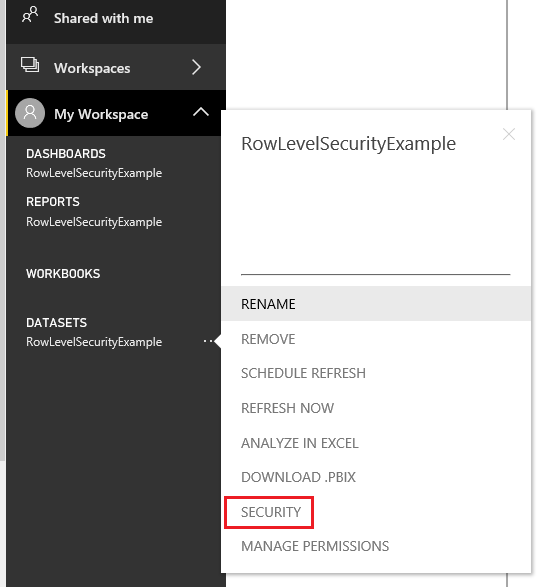 4. Enter the name of the user or group you want to apply Row-level security to. 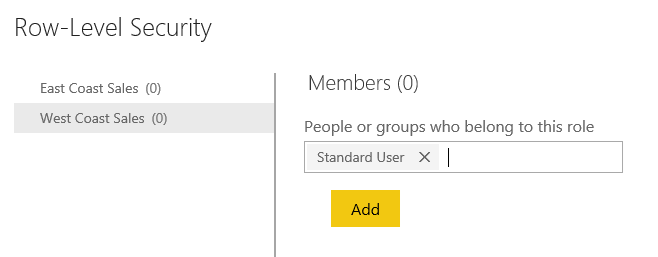 5. Click Add. 6. Click Save. Now that we have a working Power BI Dashboard with Row-level Security applied, let’s look at how it renders in Dynamics 365. 1. From the Dashboard, add a new Power BI Dashboard and select the Dashboard you published to the Power BI service. Note: if you are not presented with the option to create a new Power BI dashboard within Dynamics, you may need to enable Power BI on the Reporting tab in System Settings.  2. Share the Dashboard with any user or team who will need access. 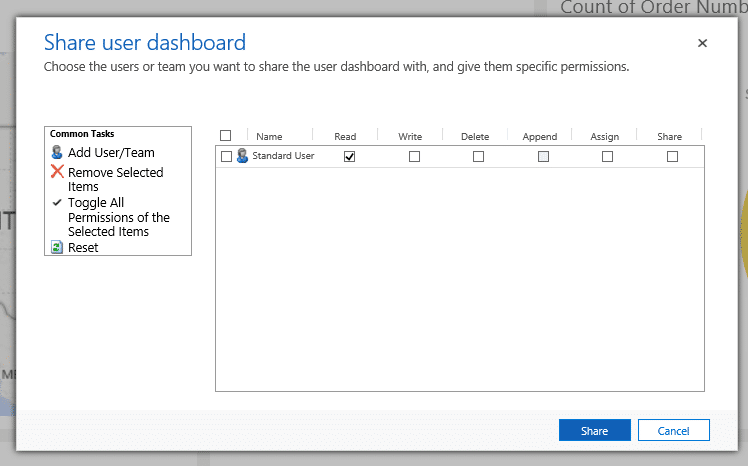 That’s it! Maximizing the report in CRM as Power BI and CRM administrators, you’ll be able to view the Dashboard with the entire data set.  If you sign in as a Standard User and view the same Dashboard, we get different results from Row-level security in Power BI. From this screen, we can also leverage Power BI to dig into the data appropriate to their role. 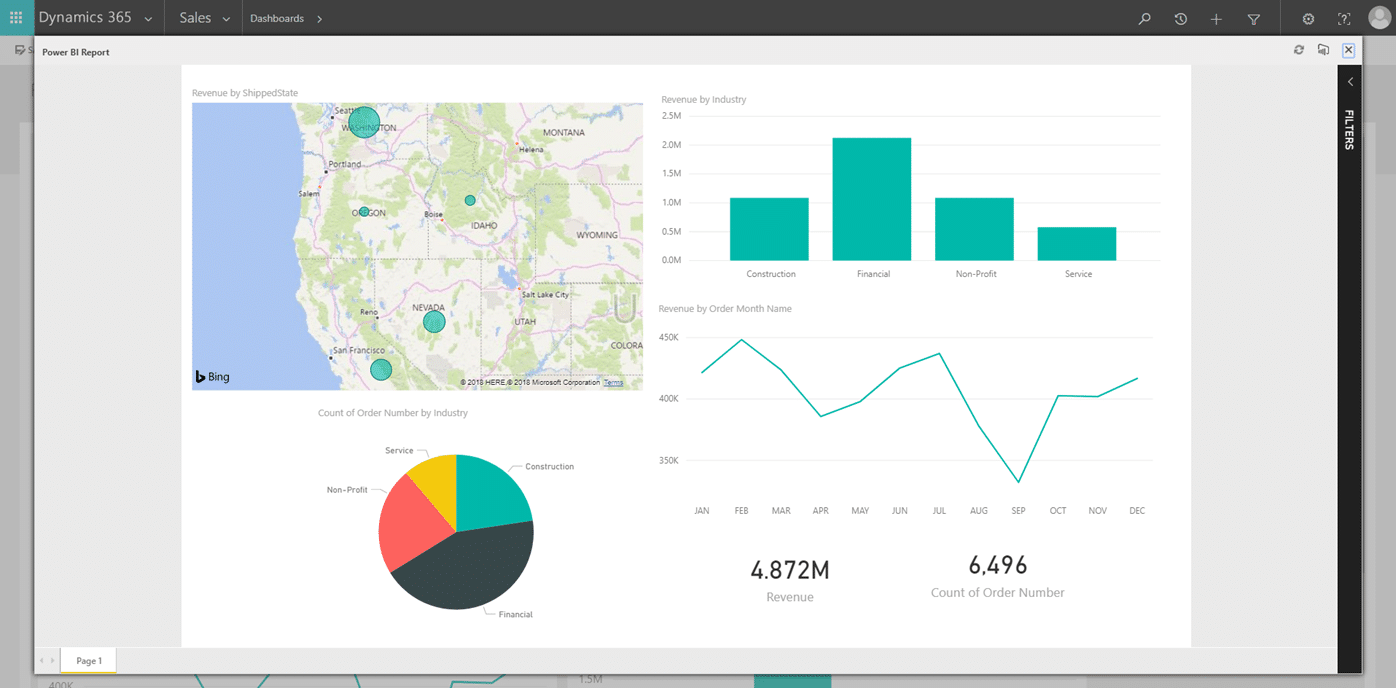 Row-level security in Power BI gives you the ability to restrict data at the row level based on true or false statements for users or groups. Leveraging the compatibility of Dynamics 365 with Power BI, we can use Row-level security to show users within CRM only the rows appropriate to their role. You can achieve the same results by putting your data into CRM and using CRM Security Roles, however, here are a few reasons you might want to use this method instead:
Happy D365’ing! Источник: https://www.powerobjects.com/2018/07...-dynamics-365/
__________________
Расскажите о новых и интересных блогах по Microsoft Dynamics, напишите личное сообщение администратору. |
|
|
|
|
|